Showing posts with label recipes. Show all posts

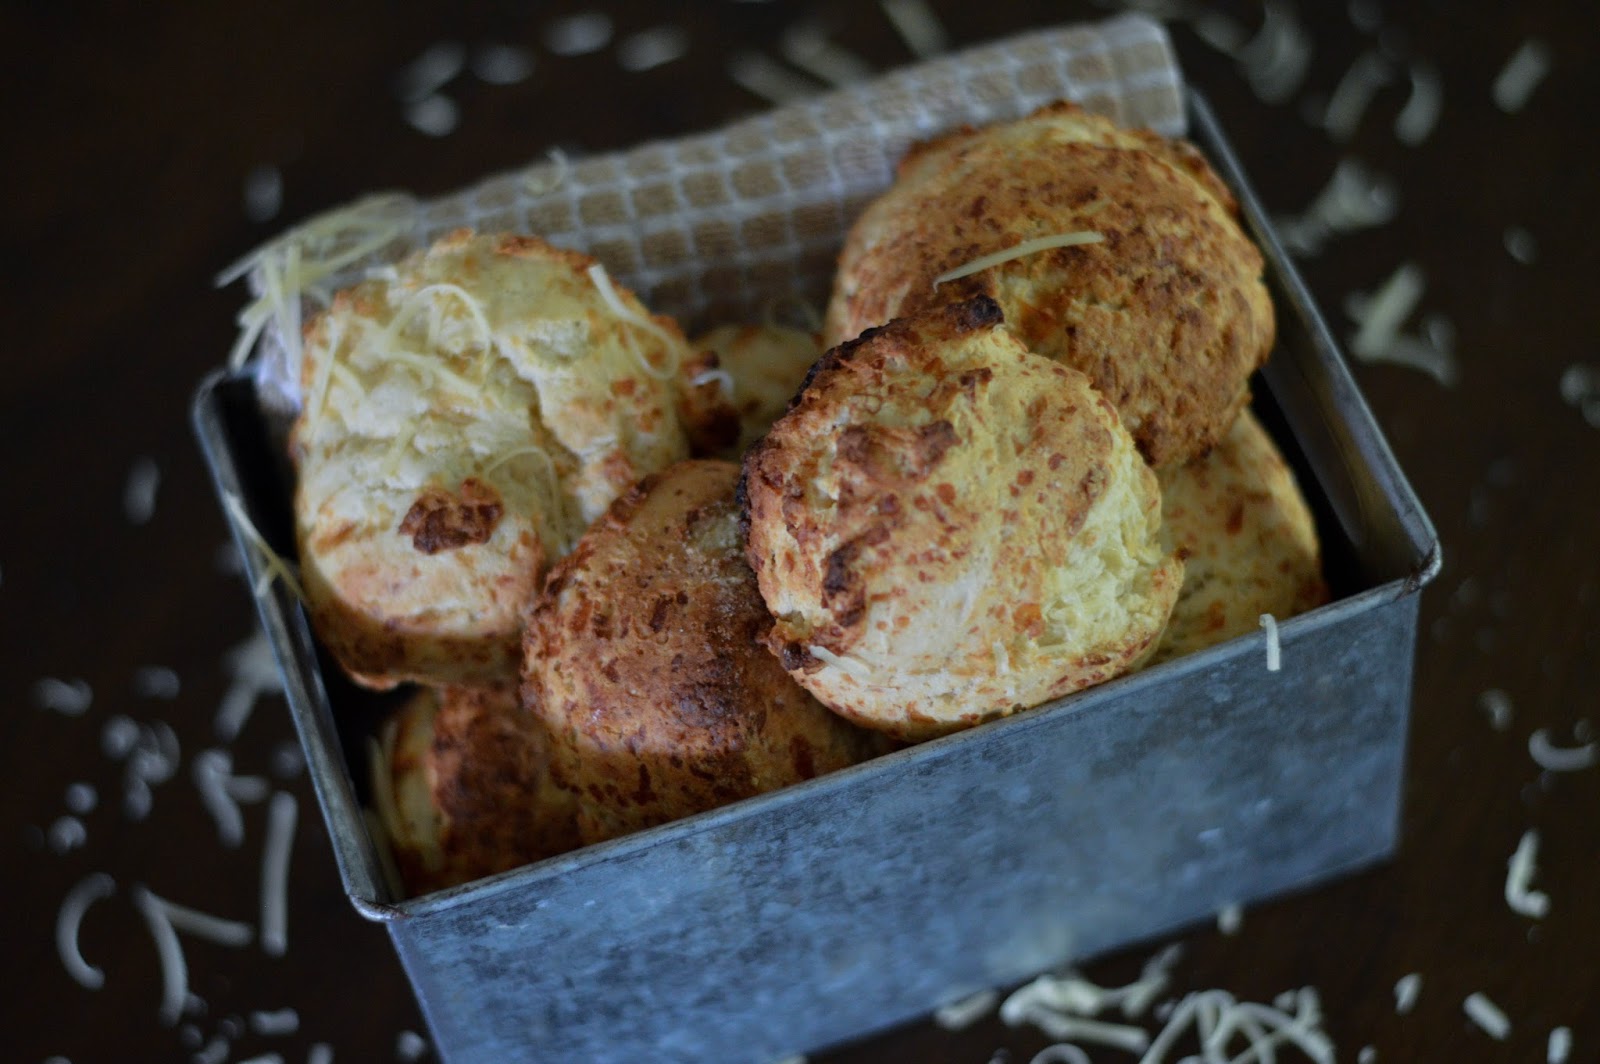
Bad-For-You, but Oh, So Good! Biscuits

cheesy biscuits recipe


We generally eat a pretty "whole foods" diet around here.  I guess that's why there's been a box of Bisquick sitting in our cabinet since last December (when I used a bit of it to make a Sausage Bread for Christmas Brunch).

I recently scored some KerryGold Ballyshannon cheese, and while it's a bit, um...cheesy to be eaten outright for our taste, I hated to waste it knowing all the nutritional benefits of grass-fed cheese.

Cue the lightbulb.  Cheesy-biscuits!  I used the Bisquick directions as a base, and then added in a few of my own to make these delicious, Garlic-Buttery Cheese Biscuits.  The way I look at it, the nutritional benefits of the cheese cancels out the terrible-for-you-ness of the Bisquick....(just roll with it..).

biscuit recipe with cheese
biscuit recipes
red lobster biscuit recipe

If you want to make your own batch of soft, warm, deliciousness, here's what you'll need:

2 and 1/4 Cups Bisquick mix

2/3 Cup Milk

1/2 stick melted Kerrygold Pure Irish Butter - Unsalted (8 ounce)

2 cups shredded Kerrygold Ballyshannon Cheddar Cheese

1 tablespoon Garlic Powder

1 teaspoon sea salt

1 tablespoon Florida Crystals Organic Cane Sugar Jug, 3 Pound


Directions:

Preheat oven to 425 degrees

Mix dry ingredients.

Add wet ingredients.

Fold in cheese.

Line a baking pan with parchment paper (wash less dishes!!)

Scoop dough into 1/4 cup sized biscuits and plop onto pan

(**I use coconut oil spray and just spray my 1/4c measuring scoop before every couple of scoops.  They plop right out of the scoop onto the parchment paper in perfect little mounds).

Bake for 10-12 minutes.

This will yield 10 biscuits at this size.

Enjoy!!!

red lobster biscuits
Pin this recipe so you don't forget!!  Your tummy with thank you!

red lobster biscuits

Tried this recipe?  Let me know how you like it or if you made any changes in the comments section below!

xo,
Mel


0

Watermelon Rind Pickles


Pickles are probably one of my favorite foods.  I love them.  I've even been known to keep the jar once all the pickles are gone so that I can drink the juice.  Some people may think that's gross, and that's fine. After all, it means more pickles for me!

When I heard about Watermelon Rind Pickles, I was skeptical.  It just sounded unnatural, but....it's not.  Back in the day it was common.  Nothing went to waste, not even watermelon rinds.
Watermelon Rind Pickle Recipe - @raisingwildfolk

These pickles are have a sweet spice to them due to the allspice, which compliments the watermelon quite nicely according to my taste testing guinea pigs here at home.

Watermelon Rind Pickle Recipe - @raisingwildfolk
   Watermelon Rind Pickles
Watermelon Rind Pickles

So, let's get to the recipe.

You will need:

watermelon rinds (I used half a watermelon worth)

2 tablespoons salt

1 cup apple cider vinegar

1 cup water

1 cup sugar

1/2 cup brown sugar

2 tablespoons pickling spice

1/2 tsp allspice


Peel the green skin off the rinds, and slice into 1" strips.  Mine were apporoximately 3-4 inches long.

Boil rinds until they begin to look translucent and feel slightly tender.  Drain and let cool.

Combine remaining ingredients in a medium saucepan and bring to a boil until sugars have dissolved.

Place cooled rinds into mason jars, and pour the pickling liquid over the rinds, just covering them with the liquid.

Enjoy your pickles after a few hours of refrigeration.  Pickles should last up to 2 weeks in the refrigerator.

Watermelon Rind Pickle Recipe - @raisingwildfolk

Tried it?  Let me know what you think in the comments section!

0

Almond Joy Pie


**Let me start by saying I originally came across this Almond Joy Pieas a pin on Pinterest. Not wanting to forget to make it, I even made it the cover photo for my Sweet Treats board.  When I finally decided to make the pie, I clicked the link and BOOM - "you must be invited by the author to view this blog."  Seriously?!  I'd been waiting so long for this pie, and I wasn't going to get to view the post?
And then I thought about all the other people who saw this coconut-y goodness on pinterest and weren't going to get the recipe either, so I had to write a post on it.

This pie is to die for.  No joke.  I'm not even going to waste any time talking about it - let's just get to the recipe.

To recreate the slice of deliciousness- aka Almond Joy Pie you see above, you will need:

1 OREO pie crust
1 cup chocolate chips
2 cups shredded coconut (sweetened)
1/2 cup sugar
4 tbsp melted butter
1 beaten egg
3/4 cup milk
1 tsp vanilla extract
1 tbsp flour
about 1/2 cup almonds 

Preheat oven to 350 degrees.
Begin by placing a layer of almonds on your OREO crust.
Melt half of your chocolate chips, and drizzle chocolate over your layer of almonds.
Place in the fridge to set while you continue with the next step. 
In a large bowl, mix butter, coconut, flour, egg, milk, vanilla, and sugar.
Pour mixture over your layer of hardened chocolate. 
*It doesn't have to be completely hardened.
Place in preheated oven for about 45 minutes.
Allow pie to cool, and arrange remain almonds on top.
Melt the remainder of your chocolate, and drizzle over top layer of almonds.
** Next time I will probably add much less chocolate on the top layer because although so yummy, it was a little difficult (ie. I almost needed a chainsaw) to cut through the thick layer of chocolate on top.  

Place pie in fridge.  You can serve cold, or take out an hour or so before you're ready to serve.
almond joy pie


Yum!!


2

Corn, Avocado, and Tomato Salsa

While the rest of the country has been dealing with blizzards and ice, Florida has been enjoying what might be considered t-shirt weather by the rest of the country.  Sure, we've been donning our boots and jackets, (Hey! 50 degrees is cold when you're used to flip-flops and shorts), but we don't have to worry about lack of fresh produce while we try to detox from our treat-filled holiday celebrations. 

Here in Florida, we have so many fresh, local options when it comes to produce year round, The farmers' markets are in full swing every weekend, and one of our major grocery store chains tries to carry as much local produce as possible.  

Last weekend, I recreated the Florida Corn, Tomato, and Avocado Salsa Recipe from the Fresh From Florida website.  So fresh, and delicious!

Here's what I used:
About 35 minutes, and:

4 ears of corn
2 large tomatoes
1 large avocado
1/2 cup red onion (chopped fine)
1/2 cup bell pepper (chopped fine)
1/4 cup fresh cilantro (hand torn)
1 lime
1 tsp powdered cumin
hot sauce (as desired)
sea salt
pepper

Directions:

Preheat oven to 350 degrees

Remove husks and silk from corn, and rub with butter

Wrap corn cobs individually in aluminum foil and place in oven for 35 minutes

While corn is roasting, finely chop red onion and bell pepper.  (I used my food processor).

Dice tomatoes.

Cut avocado.
Combine ingredients in a large bowl.

Add juice of 1 lime, teaspoon of cumin, and torn cilantro.*

*(There are 2 types of people in the world - those whole love cilantro, and those who - well, don't.  I'm one of the latter, so I chose to omit the cilantro.  It still turned out delicious.)

Once the corn is done, slice the kernels off the cob and to bowl of ingredients.
Add your favorite hot sauce, salt and pepper to taste, and mix well.

Yum!  This pairs great with chips for a party, as a topping for a Fiesta Chicken Salad, or even as a side for taco night.

Do you have a favorite salsa recipe?  Feel free to link to it in the comments.


You can find this recipe linked up at
The Mixing Bowl Recipe Party.
Put a Bird on It
Awesome Things Tuesday
Share It Link Party
Too Cute Tuesday
2

Easy Oreo Truffles

oreo truffle recipe
My aunt gave me the recipe for these OREO truffles a few years ago, and I've made them every year around the holidays since.  With the new baby this year, I sort of forgot about these little gems (and really any treat baking for that matter) until one day when we were riding in the car and Little Guy said, "Oh Mom!  Don't forget to make your truffles!  It's tradition."

Well...

I hadn't quite thought about them like that, but looking back, I remember always having certain treats (fudge, chocolate covered pretzels, and butterscotch haystacks) every year as a child and how I thought of them as tradition.  Now it seemed Little Guy was beginning to think of the treats I made as tradition, so I certainly couldn't let him down.  And they're super easy and only take 3 ingredients so there was definitely no excuse.

All you need to make them is:

1 pack of OREOs
1 box of cream cheese
1 bag of semisweet chocolate chips (or any chocolate of your choice)

Directions:

Crush OREOs in food processor until consistency shown above.  
Add cream cheese and process until mixture forms a thick paste.
Roll mixture into 1 inch balls and place on a parchment paper lined tray.
Once all mixture is rolled into balls, place tray into fridge to cool.
Melt chocolate.
Coat 1 inch balls in the melted chocolate and place on parchment paper lined tray.
Allow to chocolate to harden undisturbed. 
**Note:  If you place the tray back into the fridge for the chocolate to harden, the truffles will have to remain refrigerated.  

Enjoy!
oreo truffles


**Do you have any traditional treats in your family?


6
Powered by Blogger.
All content and images are © Melinda Collazo 2011-2016.

ShareThis

Search

Social Icons